Hybrid Platforms
Hybrid platforms are ideal for users who intend to engage with ATLAS open data on a continuous basis. Moreover, some of these tools can be used even without an stable internet connection.
By setting up a local environment, you can manage your data and analysis workflows more directly. However, this method is more time-consuming as it involves installing and configuring the necessary software and tools.
Docker
Docker provides a robust platform for developing, sharing, and running applications within containers. ATLAS open data can be accessed through pre-configured Docker images for running the analysis in notebooks.
Steps to run ATLAS open data using Docker:
- Install Docker: Download and install Docker from the official website.
- Open Docker
- Run the Docker Image: Open your terminal and run the Docker image, available on our GitHub registry.
docker run -it -p 8888:8888 -v my_volume:/home/jovyan/work ghcr.io/atlas-outreach-data-tools/notebooks-collection-opendata:latest
- Launch the Notebook: After running the Docker image, use the link provided in the terminal to access the Jupyter interface. The terminal should look like this:
To access the notebook interface, open this file in a browser:
        file:///home/jovyan/.local/share/jupyter/runtime/nbserver-15-open.html
    Or copy and paste one of these URLs:
        http://4c61742ed77c:8888/?token=34b7f124f6783e047e796fea8061c3fca708a062a902c2f9
     or http://127.0.0.1:8888/?token=34b7f124f6783e047e796fea8061c3fca708a062a902c2f9
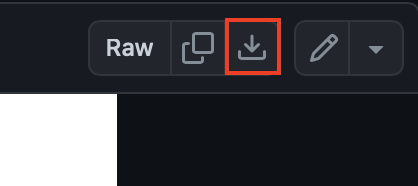
- Select a Notebook and Upload: Navigate to either the Physics Searches: Standard Model or Physics Searches: Beyond Standard Model and Exotics sections, choose your desired analysis and download. To download the notebook, click on "donwload raw file", in the top right corner of the file.
Under the "files" tab, click on "Upload" and select the file you want to upload. You will see the "Upload" button on the right side of the screen:

- Clone the Whole Repository: Alternatively, you can get the entire repository inside the container. For example, you can get all the notebooks by running the following inside the container terminal:
git clone https://github.com/atlas-outreach-data-tools/notebooks-collection-opendata.git
- Begin Analysis: Start your data analysis within the Docker environment.
Virtual Machines DEPRECATED
The 13 TeV ATLAS Open Data virtual machine (VM) allows you to create a virtual (rather than actual) operating system and test the open data on your own host machine. This enviroment is aimed to running the notebooks and the frameworks.
Virtual machine installation
To use the virtual machines we need to install:
- Oracle VirtualBox.
- The virtual machine itself.
1. Oracle VirtualBox installation
The Oracle VirtualBox is the chosen software that supports Microsoft Windows, Linux, FreeBSD, Mac OS X, Solaris / OpenSolaris, ReactOS, DOS and other systems. Donwload the software from the oficial website. Follow the instructions below to install VirtualBox on your computer:
Check our ~3 min video tutorial on how to install VirtualBox
Click here to see the instructions in images.
-
Donwload VirtualBox: Download VirtualBox for free on the official website.
-
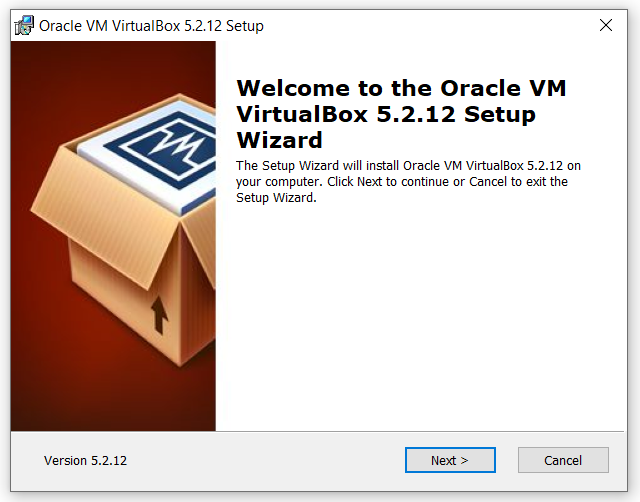
Install VirtualBox. Find the downloaded file in your computer (usually the downloaded file is in С:\Users\User\Downloads"filename"), run the program and click "Next".
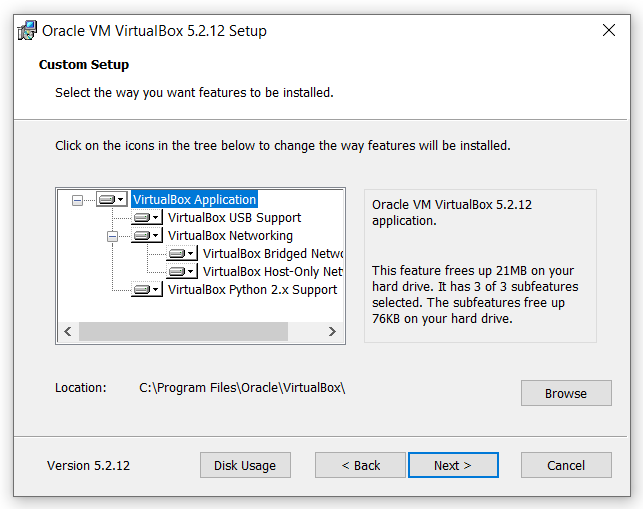
After that, the component selection window will appear. Without changing anything, click "Next".
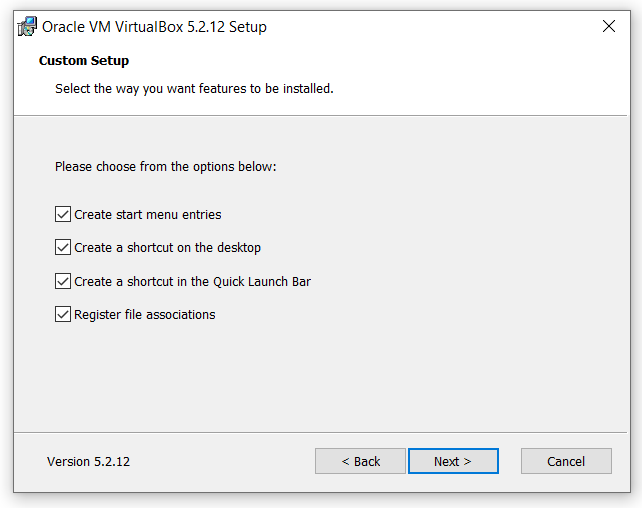
In the next window, without any changing click "Next"
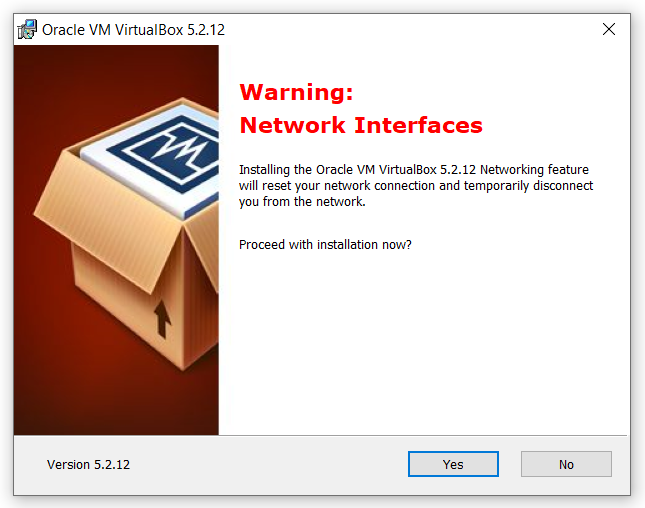
Now a window will appear that says that the Internet will be temporarily disabled during the installation of the program. Click "Yes".
And click "Install" to begin the installation.

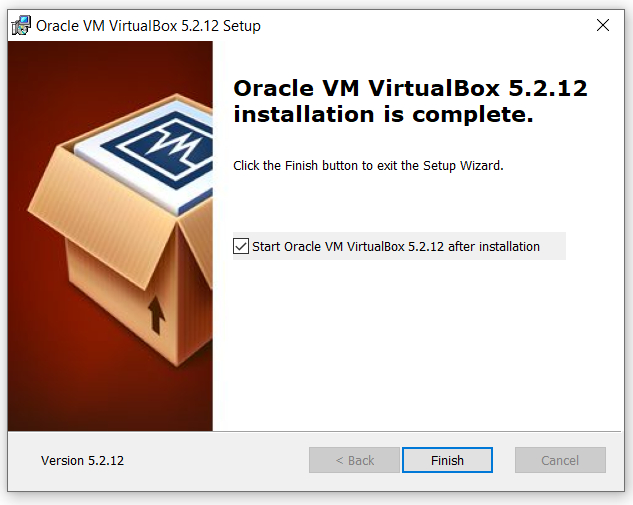
After the installation process is complete, click "Finish"
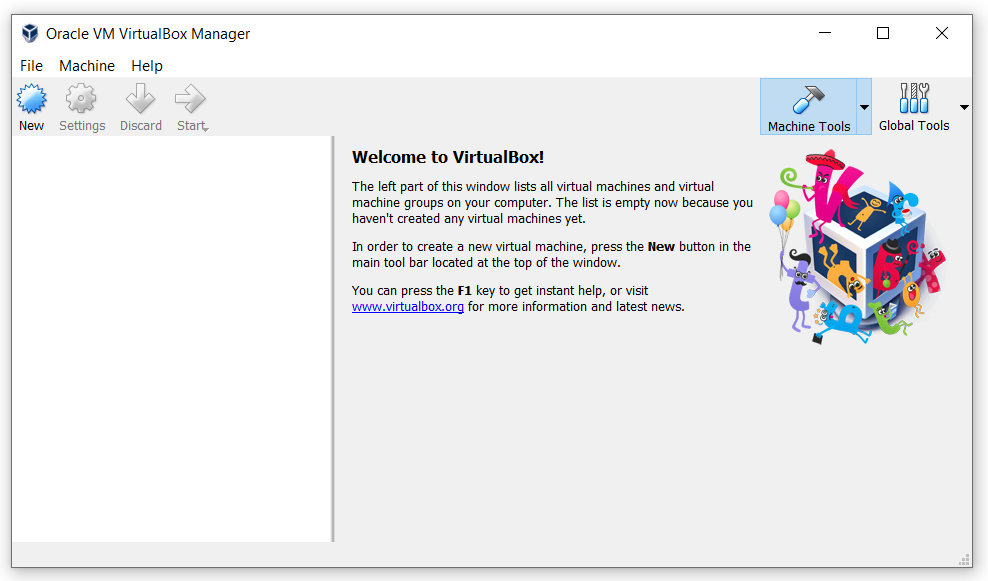
Now you will see a clean window of your virtual machine without any operating systems:
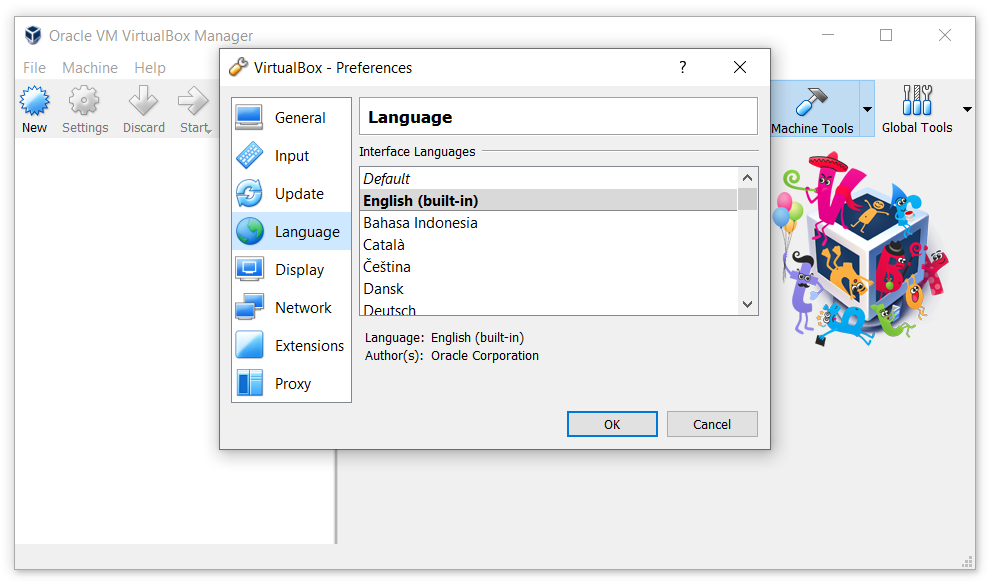
- Configure VirtualBox: If you have English installed on your system, the program will automatically change the interface language to English when you first start it. If this does not happen, go to the menu “File” -> “Settings or Preferences” and on the Languages tab select your language.
2. Virtual machine installation
- Download the latest ATLAS Open Data virtual machine
Click here to download the virtual machine.
This is an Ubuntu 18.04.3 LTS with:
- ROOT 6.18 (configuration all)
- Jupyter (bash, python2, python3, ROOT C++ kernels)
- Extras TensorFlow + demo git repos
- Cite with

- The password of the VM is root (also to be
sudo)
Check our ~9 min video tutorial on how to install the virtual machine
Click here to see the instructions in images
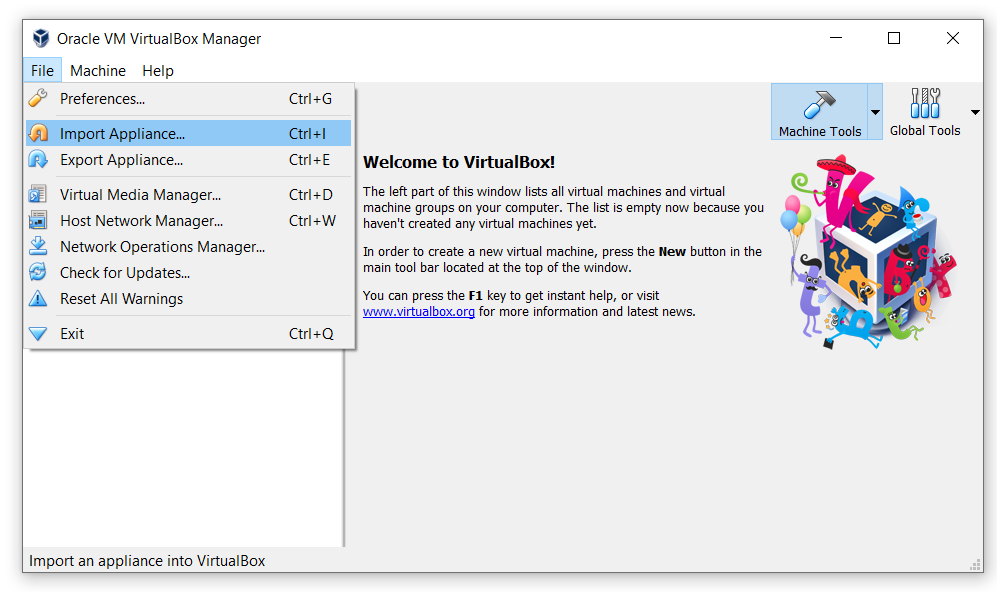
- After you downloaded the VM file, start the VirtualBox. Go to the menu "File" -> “Import Appliance...” (or perform the same function with the combination of buttons: "Ctrl" + "I").
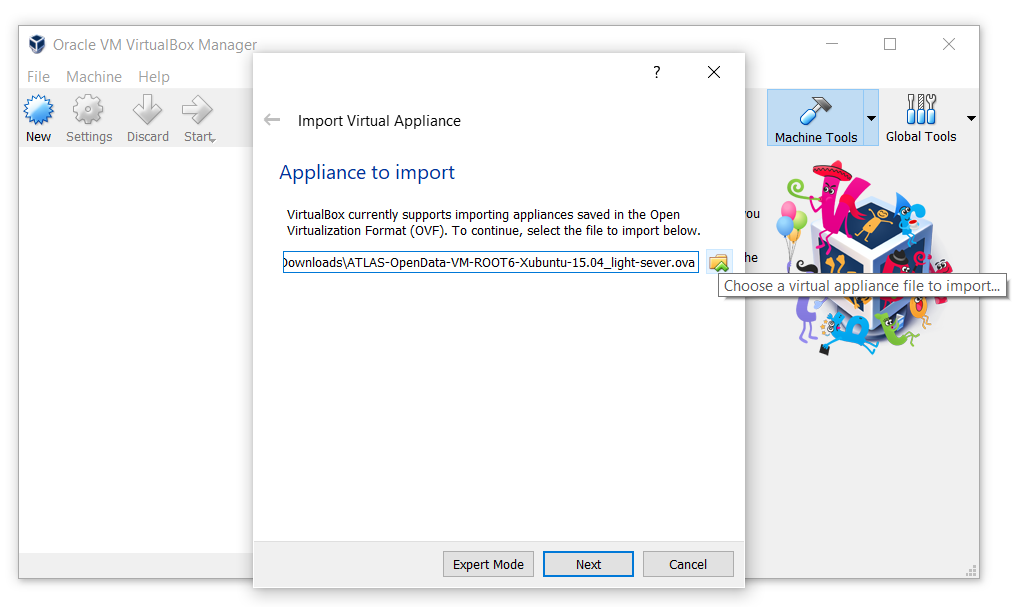
- In the window, select the downloaded ".ova" file from the Downloads folder and click "Next":
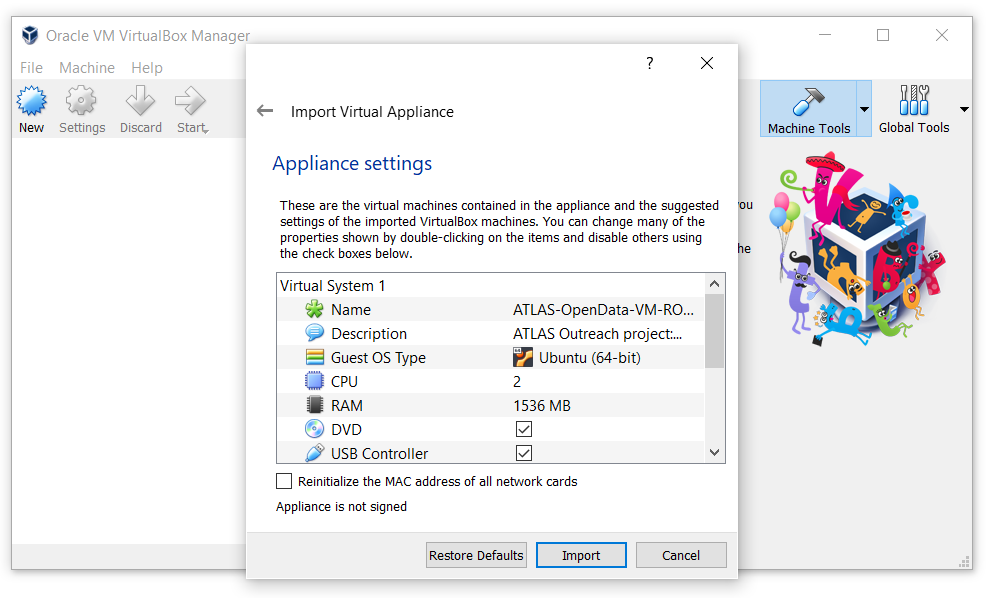
- Click "Import" without any changes:
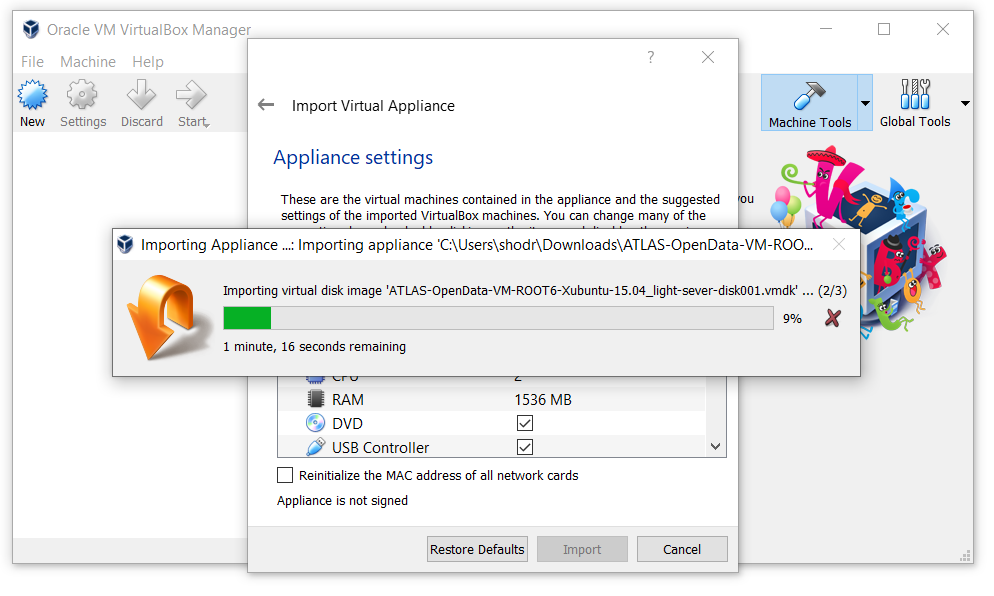
- The operating system should begin importing:
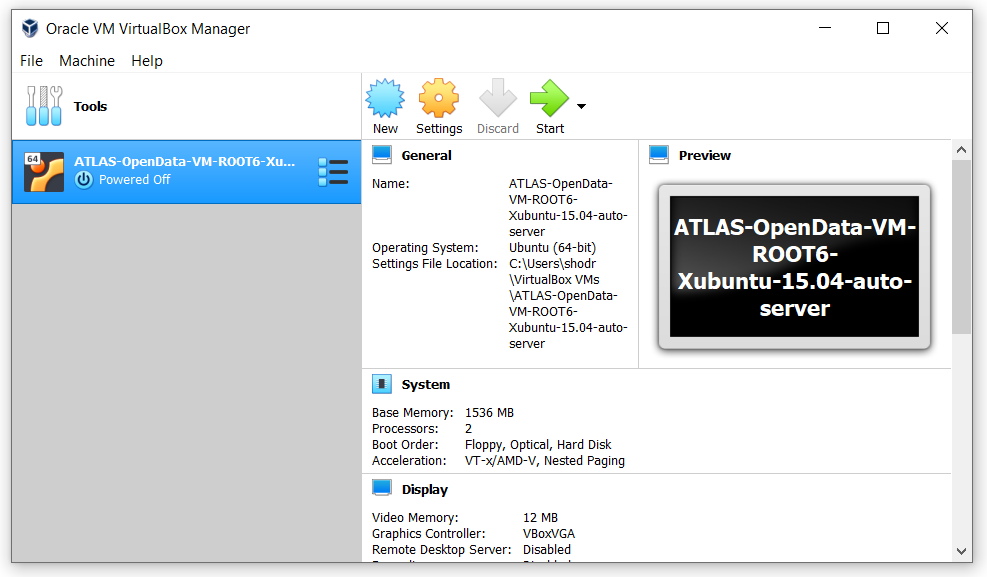
- Now your Virtual Machine with Ubuntu-Linux operating system is ready, start it by clicking
 and use:
You may come across issues with hardware virtualisation. Some computers have virtualisation disabled by default. If you do, and due to the various manufacturers, the best is to Google something like: "how to enable virtualisation in [insert name and model of your computer]".
For example, here is a solution for Lenovo:
- Boot systems to BIOS with the F1 key at power on.
- Select the Security tab in the BIOS.
- Enable Intel VTT or Intel VT-d if needed.
- Once enabled, save the changes with F10 and allow the system to reboot.
How to Run the Virtual Machine
Take a look to this video on how to get and run some notebooks and framework in your computer