Setup Your Environment
Watch the video 'Setup your environment' to give you an idea what you will have to do.
We have provided the datasets and software in a variety of formats. You choose how you want to use them.
What is a virtual machine ?
A virtual machine will transform your computer into an analysis machine!
Your physical computer will be the "host", while the virtual machine will be a "guest". Most of the guest code runs unmodified, directly on the host computer, and the guest operating system "thinks" it's running on a real machine.
A virtual machine allows an unmodified operating system with all of its installed software to run in a special environment, on top of your existing operating system.
There are five virtual machines available. We suggest you start with the small version. It contains everything you need to start looking at the data.
Now you will learn how to download and prepare a virtual machine to run on your computer. This will then enable you to take a look at ATLAS data.
Setting up your own virtual machine
To best suit your needs, consider the following virtual machine setups:
-
Small Virtual Machine (06-Feb-2017): Ideal for quick reviews, this VM contains 10% of the data. It typically takes about 15 minutes to download and set up.
-
Large Virtual Machine: Recommended for more in-depth use or educational purposes, this VM contains all the data. Expect a download and setup time of 1-2 hours.
You have to download and install VirtualBox and a virtual machine. To save time, start downloading the virtual machine. This can then download whilst you are installing VirtualBox.
There are three steps to setup your environment:
- Download a virtual machine.
- Download and install VirtualBox.
- Setup your virtual machine.
Step 1: Download the Small Virtual Machine (VM Version S 06-Feb-2017)
A small virtual machine using Lubuntu in conjunction with ROOT-5.34.14 and 10% of the data has been prepared. This is 1.7Gb in size so can be downloaded fairly quickly.
Select VM Version S to download the small virtual machine. This can then download whilst you are installing VirtualBox.
Make sure you choose **Lubuntu_ATLAS_Outreach_DataAndTools_February_2017-size_S.ova **
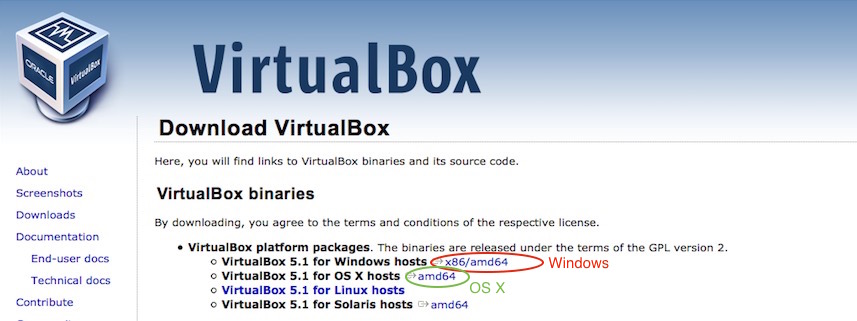
Step 2: Download and install VirtualBox
Use the VirtualBox website to download the software
Go to the VirtualBox websiteSelect Download VirtualBox

Take care to select the appropriate VirtualBox platform package.
Proceed with the installation of VirtualBox:


Step 3: Set up your Virtual Machine
In this step the downloaded virtual machine is being imported to VirtualBox to give the virtual machine a platform to run on.
Look for the VirtualBox icon in your Applications (folder). Double click to get the main interface of VirtualBox:
![]()
Select File then Import Appliance

An empty text box will appear

Use the yellow folder icon on the right hand-side of the empty text box to select your virtual machine (the .ova file you downloaded at the start of this chapter).
Make sure you have downloaded the small virtual machine. It will be called ATLASOpenDataSmall.ova
Then press Continue.

The default settings are displayed. We recommend you use these. Press Import.

Import will take afew minutes

Select your virtual machine ATLASOpenDataSmall (which is powered off)
If your VM is not called ATLASOpenDataSmall you have not downloaded the small virtual machine. You need to be using the small VM for these instructions.

Your VM will be displayed as shown below
Check that the name of your virtual machine displayed on the right is ATLASOpenDataSmall

Press the green Start arrow.
WAIT afew minutes whilst the virtual machine sets up.
When it has completed you will see the terminal for using the code, with the Readme file opened using the atom editor.
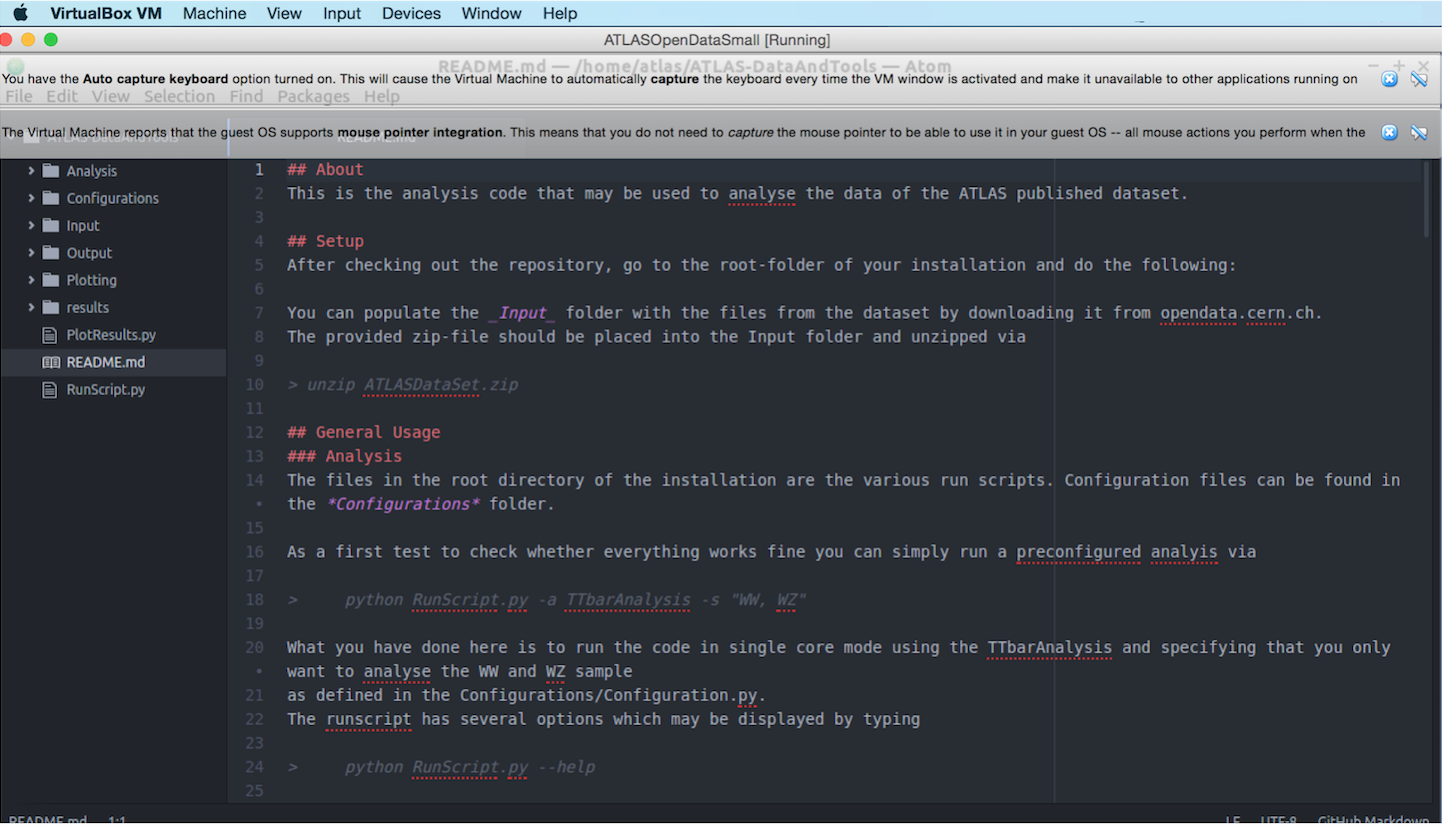
In the menu on the left handside, you see the contents of the root directory.
In the root directory there are five directories (Analysis, Configurations, Input, Plotting and Output), the README file plus two python scripts. The python scripts are RunScript.py and PlotResults.py.
At the bottom of your window, you will notice a tab labelled atlas@atlas-vm.

Select this tab, circled in red in the screen-shot. A terminal window will then be available.
List the folders and files in your main directory by typing
ls
You will notice that these are the same names as you saw in the menu (screen-shot above).

You are now ready to start looking at the ATLAS data.
If your session goes to sleep and requires the atlas password, it is atlas.
